How to Build a Bar stool in Just 4 Steps
Do you want to build a barstool? While most of you would rather receive it assembled, building it isn’t that complicated. Yes, when you see the different bar stool parts, the first thought that pops into your head is “I can’t do it.” That’s where you’re wrong. You can do it!
Our easy-to-follow instructions get the entire task done in four steps. We bring you step-by-step instructions on how to build a gas lift barstool and the mistakes you want to avoid making. So, let’s get to it!
What You Will Be Assembling: Gas Lift Bar Stools
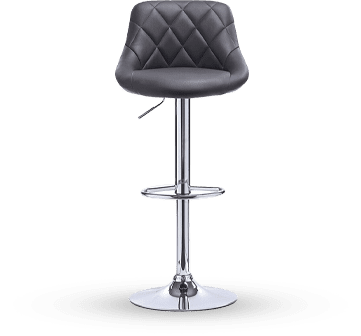
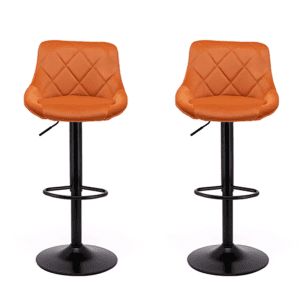
Our gas lift bar stools are one of our hottest selling bar stools Cork, Bar stools Dublin, and the rest of Ireland. A gas lift bar stool adjusts to your height. You can lower it or raise it to your desired comfort level. They are popular among homeowners due to having family members and guests of all ages and heights.
The Gas Lift is an Effortless Way to Adjust the Bar stool’s Height
How Does a Gas Lift Bar Stool Work?
Our gas lift bar stools consist of a hydraulic column that comprises most of the primary stem of the bar stool with the footrest partially covering it. Don’t get confused by the terms gas lift and hydraulic, as both terms mean lowering and raising bar stools and are used interchangeably.
The hydraulic column consists of two cylinders, one on the inside and the other on the outside. Together, the inner and outer cylinders extend and contract compressed gas. When you assemble this mechanism, insert the hydraulic column’s larger part into the opening in the base, which a compression joint holds together.
Next, you’ll place the narrower part into the stem of the footrest, leaving the top button visible to alter the bar stool’s height. But before we get ahead of ourselves, let’s first familiarise you with all the different bar stool parts.
Bar Stool Parts You Need to Know
When you order bar stools from us, we send you eight different parts and tools you need to build your bar stool. Here’s what you get:
- Hydraulic Column (1x)
- Circular Floor Base (1x)
- Seat (1x)
- Decorative Collar (1x)
- Footrest (1x)
- Screws (4x)
- Spacers (4x)
- Allan Key (1x)
You Know The Parts, Now, It’s Building Time!
4 Steps to Build a Bar Stool
- Place the circular base on the surface, put the decorative collar over the base, and then remove the black protective cap from the hydraulic cylinder and place it through the decorative collar and into the base.
- Use the Alan Key to attach the footrest to the seat with the spacers and screws.
- Push the attached seat and footrest onto the hydraulic cylinder.
- Sit on the barstool to connect both parts together and activate the gas lift mechanism.
For visual learners, we have created an illustration, depicting the four steps to build bar stools. The letters correspond with the letters on the illustration, so use both, including the method, to assemble your barstool.
We Told You It Would Be Easy! If You Get Stuck, We’re at Your Service
To further ensure you don’t encounter any roadblocks when building your bar stool, we have narrowed in on the most common mistakes people make when building their barstool.
Don’t Make These Mistakes When Assembling Bar Stools
What’s more frustrating than to finish building a barstool only to find out that it’s assembled wrong and you have to start all over. Don’t let the latter come true by making sure you don’t make the following mistakes when putting together your barstool:
Mistake #1: You Forgot to Position the Spacers Properly
You need to position the spacers between the holes for the screws in the seat and the plate above the footrest column. Place the larger spacers at the barstool’s front and the smaller spacers at its rear. If you position the spacers incorrectly, you will feel like you’re leaning forward in the seat.
Mistake #2: You Forgot to Remove the Protective Covering from the Hydraulic Column
If you don’t remove the black protective cap from the hydraulic column, the cap can become stuck and cause the gas lift mechanism to malfunction. You won’t be able to lower and raise the barstool if this happens.
Mistake #3: You Forgot to Tighten All the Screws Evenly
You need to tighten all the screws loosely first. You need to position the bar stool on the floor of the area you intend to use, and then completely tighten all the screws. You need to align the screws before you tighten them.
To help you out, turn the seat upside down, place it flat on the surface, and place the footrest column on top of the seat, ensuring the footrest aligns with the front of the seat. This will result in the screws aligning correctly with their corresponding hole.
Mistake #4: You Forgot to Position the Seat Properly
You need to ensure the seat faces the same direction as the footrest when you attach the seat to the hydraulic column. The top of the hydraulic column is slanted in a manner that enables the seat to lean back a little. You can use this as a reference to position the seat properly.
Mistake #5: You Forgot to Call Us for Assistance
If, at any time, you don’t understand the instructions or are confused, please do not hesitate to get in touch with us. If you assemble it wrong and need help in disassembling and assembling it again, contact us. We will do our best to ensure you don’t run into any difficulties— not before and not after delivery.
Explore Our Vast Collection of Barstools to Build One That’s Perfect for Your Home
We put quality first because we put you first. Customer satisfaction continues to play a key role in our success. Our aim is clear. It’s to give you the best bar stools in Dublin, Cork, and across Ireland. Our satisfied customers include homeowners and business owners. Next on our list of happy customers will be you!
bar stools ireland
Conor McCormack Newry


